Establish Connection
After Remote mode for RDK is enabled and entered on the robot, a connection between the user’s workstation PC and the robot can be established following steps below:
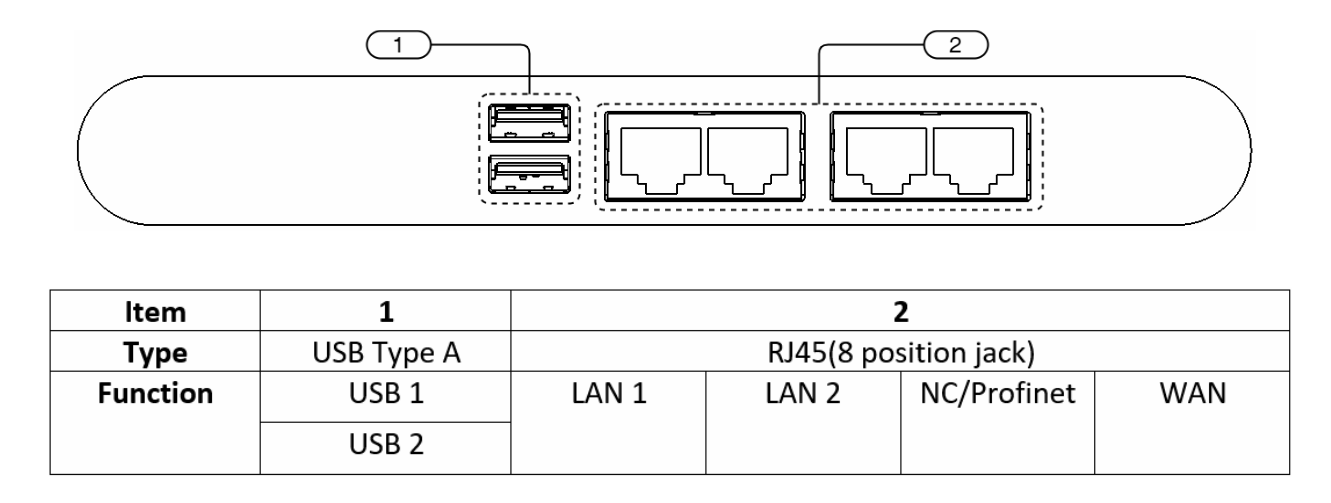
Use an Ethernet cable to connect the Ethernet port on the workstation PC to any of the LAN ports on the robot’s control box.
Important
For real-time controls of the robot, a direct wired connection between the workstation PC and the robot is required. Going through additional network devices or wireless connection can result in failed timeliness check. However, this restriction does not apply to non-real-time controls.
Check that E-Stop (emergency stop) on the motion bar is pressed down.
Follow Enter Remote mode to boot the robot and enter Remote mode for RDK.
Verify the robot is working normally by using Flexiv Elements to enable (servo on) it.
Now the connection between the workstation PC and the robot should be established. Check the connection by pinging the robot from the workstation PC:
ping <robot_ip>
robot_ipis192.168.2.100by default. The time value from the ping command denotes the round trip latency. Make sure this latency complies with the requirement listed in System Requirements.Note
The workstation PC and the robot must be under the same subnet to connect. This happens automatically if the two are connected to the same network router that has an active DHCP server.